Web UI Admin Interface for MongoDB
We provide excellent user interface, Using which anyone can manage their MongoDB easily. In this article, we will discuss about, how to handle the DB using UI. We will explain about each features in brief.
Creating mongo database:-
A database can be created using the web-based administration tool provided by the OVIPanel, using this module you can create number of databases which can have a number of users with different privileges.

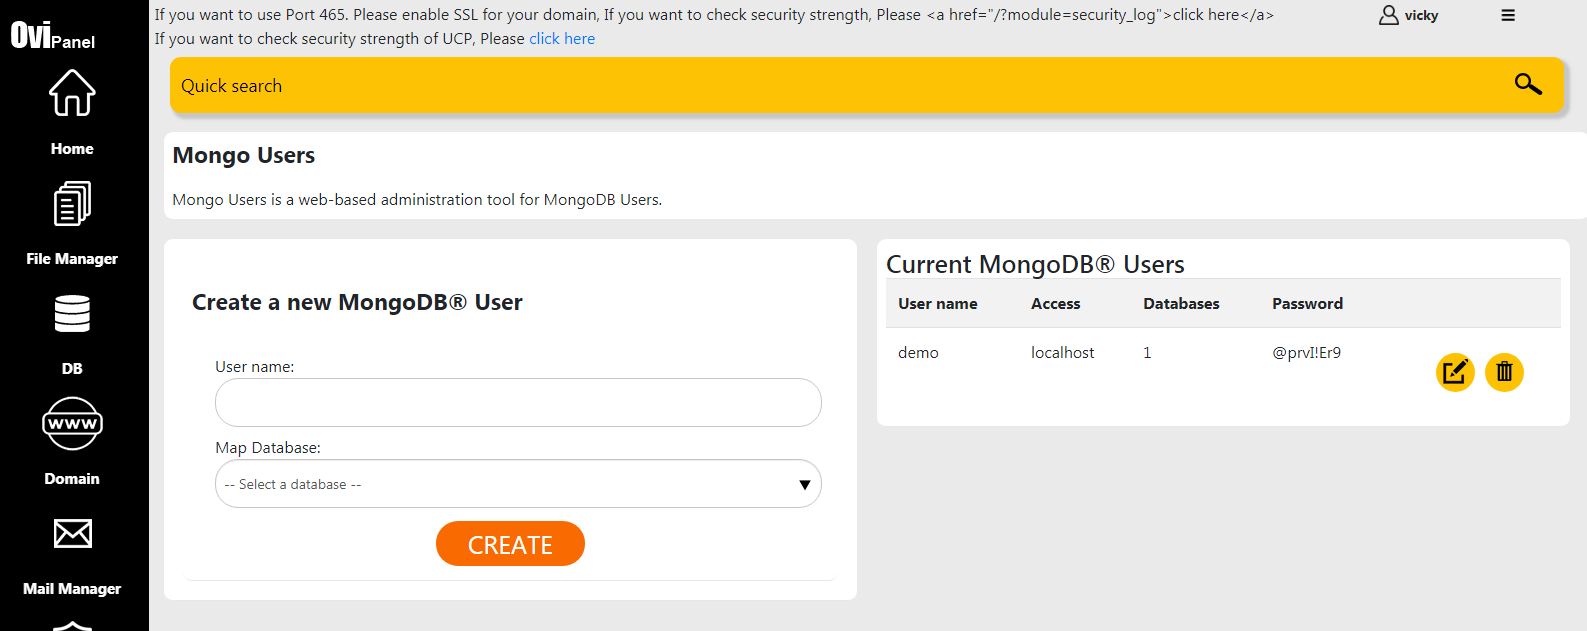
Creating mongo users:-
Users for a database in mongo can be created using the web-based administration provided by the OVIPanel. In this module you can create users for the created database and give different privileges for the users.
Mongodb dashboard and server details:-
Once you login to mongo admin using the created database, username and password you will see the dashboard of the mongo admin where the details regarding the mongoDB connection and the web server will be shown. The connection will show the details regarding the host and the port number in which mongoDB is currently running, the web server will show the details of which web server mongo admin is using and the php version currently used and mongo version, you can check the directives and the global and local values assigned to the directives.

MongoDB server status:-
The serverStatus returns a document that provides an overview of the database’s state. you can know the status of the database by clicking on the status option provided in the mongo admin panel or you can run the mentioned command also "serverStatus". Monitoring applications can run this command at a regular interval to collect statistics about the instance.

Mongo admin database:-
You can see the list of databases created and the properties of the database like storage size, data size, Index size, collections, objects. you can also create a new database using the create database option provided.
Mongo process list:-
Process list option provided by mongo admin it will connect to the corresponding MongoDB server and check for the current process and displays them in a readable format, you can also check the current running processes using the mongo_process_checker command.

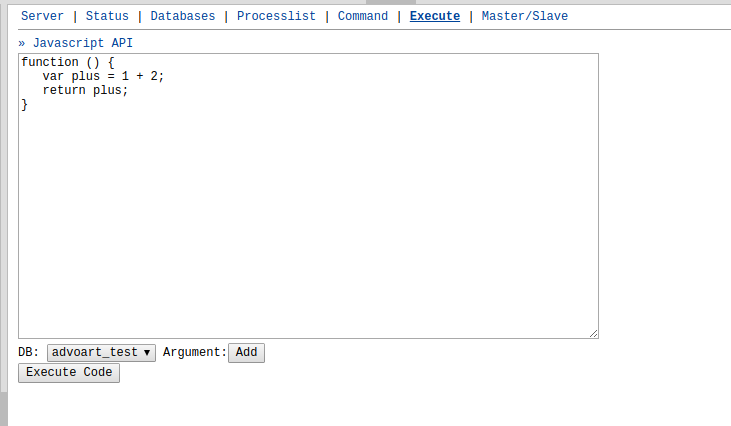
Mongo Execute:-
The execute option in RockMongo is used to execute functions like javascript API functions, It can be used for simple queries because it allows you access to your remote server from any browsing enabled device. You can run simple queries clicking on the collection name, typing your query condition in the upper area and click Execute code.
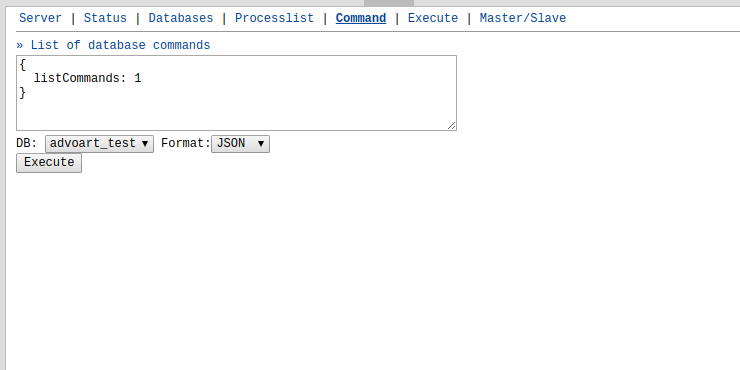
Mongo Command:-
The listDatabases command will give a list of all existing databases along with basic statistics about them. The listDatabases must run against the admin database.
listDatabases returns a document that contains:_
A field named databases whose value is an array of documents, one document for each database. Each document contains:
A name field with the database name.
A size On Disk field with the total size of the database files on disk in bytes.
An empty field specifying whether the database has any data.
Mongo master/slave:-
Master-slave replication preceded replica sets and has made it possible to have a large number of slave nodes, as well as to restrict replicated operations to only a single database; however, master-slave replication provides less redundancy and does not automate failover.
To configure a master-slave deployment, start two mongodb instances: one in master mode, and the other in slave mode.
To start a mongod instance in master mode, invoke mongod as follows:
mongod --master --dbpath /data/masterdb/
To start a mongod instance in slave mode, invoke mongod as follows:
mongod --slave --source <mtrhostname><:<port>> --dbpath /data/slavedb/
Specify the hostname and port of the master instance to the --source argument. The --dbpath is optional.
For slave instances, MongoDB stores data about the source server in the local.sources collection.
